A couple of years ago I confessed my utter failure as an interior designer in Fail! and Fail! Part Deux (Or Is That ‘Duh’?). It was embarrassing, but at least after I departed that career long ago (to everyone’s relief, including my own) I figured I was pretty safe from future colour-related embarrassment. After all, there are lots of other people who can’t create attractive colour schemes, and they get through life just fine.
And I have gotten along fine, other than a minor issue twenty years ago with house paint that turned out to be a revolting pale candy-pink instead of off-white. (But I was the only one who had to live with that particular mistake; so no harm, no foul.)
But this week my self-esteem got slapped down again: At the dollar store, where I was buying balloons for Hubby’s aunt and uncle’s upcoming 60th wedding anniversary.
The clerk paused halfway through ringing up the sale. “Are you sure you want these purple balloons?” he asked. “Were you looking for black instead?”
I whipped out my reading glasses (which I obviously should have been wearing in the first place). Sure enough, the balloons that looked black in the package were clearly labelled ‘purple’.
“Yes,” I said with relief. “Thank you! I’m really glad you caught that.”
He smiled. “I figured you must have gotten them mixed up. Purple didn’t go with the other colours you’d picked out.”
I stood gaping wordlessly. The other two colours were pearlescent gold and dark red. He was right: The third colour was supposed to have been black; but I would have thought deep purple, dark red, and gold would be fine together. It certainly wouldn’t have occurred to me to question somebody about them.
Maybe he knew something I didn’t. Maybe the balloons are actually vivid purple and screaming red when they’re inflated. But I still wouldn’t have flagged that as a mistake; I would have just assumed someone was decorating for a Red Hat event.
(And now I’m giggling, because if you follow that link to the Red Hat Society site, there’s a heading in ornate script that reads “How It Farted”… Okay, fine; it actually says “How It Started”, but I can’t help seeing ‘farted’. Clearly I’m childish as well as colour-impaired.)
Anyway, it’s a sobering thought that even a middle-aged male dollar-store employee has better taste than I do. I’m comforting myself with the fantasy that he’s actually a talented designer moonlighting as a store clerk for amusement, between his lucrative contracts with upscale clients.
At least the party decorations will look okay, because I didn’t choose the colour scheme — I was only the minion dispatched to buy balloons. So with any luck I’ll make it through another decade or so without any further hue-miliation.
Meanwhile, I’m going to go and eat some of the yummy cinnamon pinwheels I made the other day. At least I know there’s nothing wrong with my taste there!
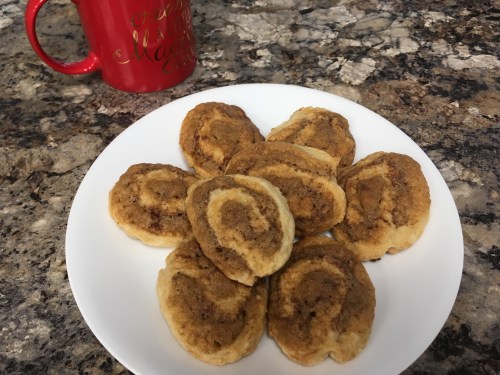
Cinnamon Pinwheels
This recipe is tasty but not too sweet… like a cross between a biscuit and a cookie. (So you can eat lots!)
Dough:
1 cup butter
1 cup granulated sugar
1 egg
1 teaspoon vanilla
½ teaspoon salt
4 cups flour
2 teaspoons cream of tartar
1 teaspoon baking soda
1 cup milk
Cream the butter and sugar. Beat in the egg, then add the rest of the ingredients and mix to form a soft dough. Sprinkle worksurface with flour, sprinkle dough lightly with flour, and roll out into a rectangle about 12″ x 20″ and ¼” thick1.
Filling
1¼ cups brown sugar
½ cup flour
1 egg
Enough milk to make it spreadable (start with about 2 teaspoons and add more as needed)
For the filling, mix the flour and sugar thoroughly, then mix in the egg. The mixture will be damp and crumbly. Add enough milk to make it barely spreadable. (Too thin and it’ll all run out before you can get the pinwheels on the pan.)
Spread the filling over the dough rectangle, being careful to push the filling out to the ends; but leave about ½” of the dough bare along the long edges at the top and bottom. Sprinkle liberally (or to taste) with cinnamon. You can also sprinkle on nuts or raisins if you like.
Cut the dough rectangle into quarters2. Beginning from one of the long edges in the middle (yes, the gooey part), roll the first quarter like a jellyroll, out to the naked edge of the dough3. Slice the roll into rounds about ½” thick4 and place them on a parchment-covered baking sheet with lots of space to expand5.
Bake at 350°F approximately 15-18 minutes, or until lightly browned. (You may have to adjust the baking time considerably, depending on how big and thick you’ve cut your pinwheels.)
*
1 Despite the layer of flour underneath, the dough usually sticks to the counter when you roll it out. Don’t panic. You’ll have a ridge of loose flour along the edges of the dough rectangle after you’ve rolled it out, so just take a thin metal egg flipper… (Spatula? Whatever those things are called.) …and slide it through the flour and under the dough. It’ll push the flour underneath and free the dough at the same time.
2 This will give you a roll about 1½” in diameter, which yields a baked pinwheel about 2″ to 2½” in diameter. If you want bigger pinwheels, you could make larger rolls.
3 Only do one roll at a time, and only slice as many rounds as you need to fill your pan. If you roll and slice the whole thing, the filling will ooze out before you can get it all baked.
4 You could cut the rounds thicker if you want a more ‘biscuit-y’ size and texture, but I prefer them more cookie-like.
5 Don’t worry when the roll squishes flat and your pinwheel looks like some weird alien/amoeba thing. Just lay it out on the parchment and push it approximately into shape. When it bakes it’ll go back to being roundish.